I came up with this idea after a recent mermaid party where balloons were also required. Instead of my big bulky apron I figured a mermaid would carry something a little more sparkly and delicate so here is what I cam up with!
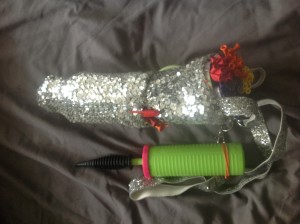
I have since used it loads! For my combination parties such as Princess, Fairy, Superhero, Pirate etc, the majority of the party is taken up with dancing and games and maybe crafts or face paint. The balloons are usually an addition where a quick 1 or 2 balloon design such as flower, sword, wand etc is required. Therefore this is idea to keep mainly larger 260Q balloons in, and the hearts for the wands fit in a side pocket (more on this later) along with a red and black sharpie (For princess / spiderman face for the birthday child!) It is lightweight and goes with most of my costumes and I am really pleased with it!
It is based on the TwistemUp balloon bag with the balloon roll idea. I have to say I have ever seen one in the flesh so to speak so have had to improvise a little from pictures, but I have the TwistEmUp apron which my
balloon apron was based on. Here is how I made it!
I started with a strip from the balloon apron I made previously
here and laid it across a rectangle of laminated cotton. When I had the right size allowing for seams and length of balloons I hemmed it.
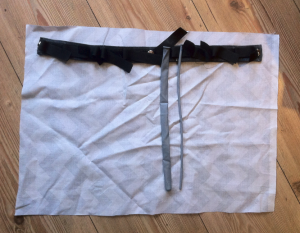
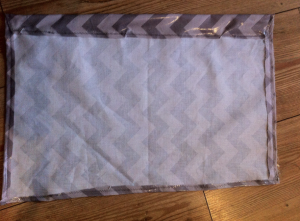
Poppers were hammered onto the fabric and the strip poppered on.
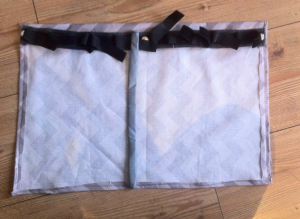
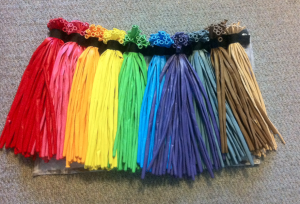
Next I loaded up the balloon strip with the most used balloons. A rainbow of 260Qs and blush 160Qs in case of an emergency fairy or princess design!
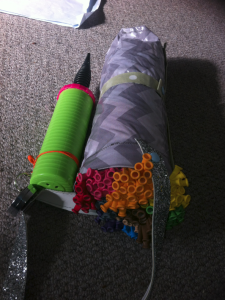
I started to roll up the design and here is where I hit a snag. As you can see the fabric didn’t quite cover the bulk of balloons. This is where it would have been useful to see the official balloon rolls in action! Not to worry though. I sewed on an additional extension of fabric ( I had run out of the original pattern however this one made a nice contrast).
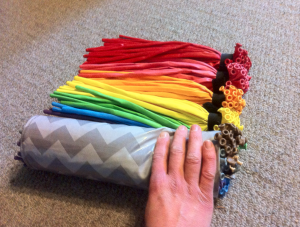
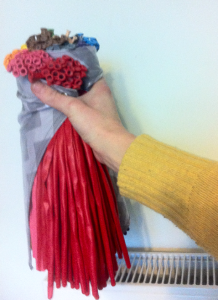
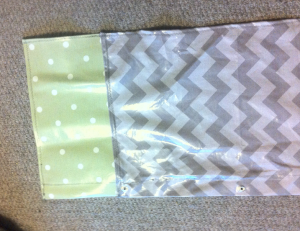
I attached an additional strip of fabric which wrapped around the roll and poppered back to itself to hold the roll in place. I then found a lovely sparkly old belt which was perfect as a strap. This too was poppered on.
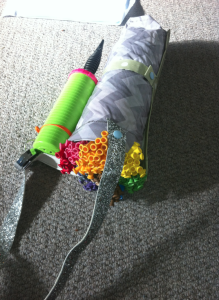
It was fine as was but needed some bling! Also a little more structure when in use – I had always intended the roll to be put into a bag. I was just trying to decide on a fabric in which to make the bag when I stumbled across these amazing old sparkly leg warmers!!
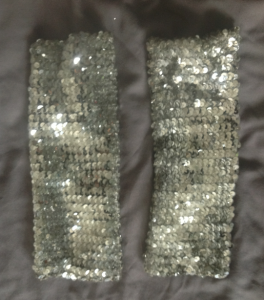
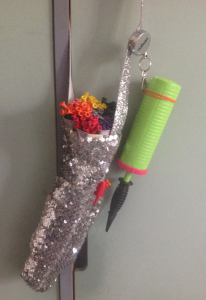
Yes I do have some strange things in my stash! They were stretchy and fitter perfectly around the roll! I closed one up at the base and then over lapped them which gave me the bonus of a pocket in which to keep my heart balloons (which I use for wands) and pens (red and black for features). A clip attached my pump and the new balloon bag was ready for action!! I have so many comments on it as I use it – usually “Wow can you really buy balloon bags like that? I am very proud to reply no – I made it! ( Or more often “no – the fairies made it for me!!”)
 I have since used it loads! For my combination parties such as Princess, Fairy, Superhero, Pirate etc, the majority of the party is taken up with dancing and games and maybe crafts or face paint. The balloons are usually an addition where a quick 1 or 2 balloon design such as flower, sword, wand etc is required. Therefore this is idea to keep mainly larger 260Q balloons in, and the hearts for the wands fit in a side pocket (more on this later) along with a red and black sharpie (For princess / spiderman face for the birthday child!) It is lightweight and goes with most of my costumes and I am really pleased with it!
It is based on the TwistemUp balloon bag with the balloon roll idea. I have to say I have ever seen one in the flesh so to speak so have had to improvise a little from pictures, but I have the TwistEmUp apron which my balloon apron was based on. Here is how I made it!
I started with a strip from the balloon apron I made previously here and laid it across a rectangle of laminated cotton. When I had the right size allowing for seams and length of balloons I hemmed it.
Poppers were hammered onto the fabric and the strip poppered on.
 Next I loaded up the balloon strip with the most used balloons. A rainbow of 260Qs and blush 160Qs in case of an emergency fairy or princess design!
 I started to roll up the design and here is where I hit a snag. As you can see the fabric didn’t quite cover the bulk of balloons. This is where it would have been useful to see the official balloon rolls in action! Not to worry though. I sewed on an additional extension of fabric ( I had run out of the original pattern however this one made a nice contrast).
I attached an additional strip of fabric which wrapped around the roll and poppered back to itself to hold the roll in place. I then found a lovely sparkly old belt which was perfect as a strap. This too was poppered on.
It was fine as was but needed some bling! Also a little more structure when in use – I had always intended the roll to be put into a bag. I was just trying to decide on a fabric in which to make the bag when I stumbled across these amazing old sparkly leg warmers!!
  Yes I do have some strange things in my stash! They were stretchy and fitter perfectly around the roll! I closed one up at the base and then over lapped them which gave me the bonus of a pocket in which to keep my heart balloons (which I use for wands) and pens (red and black for features). A clip attached my pump and the new balloon bag was ready for action!! I have so many comments on it as I use it – usually “Wow can you really buy balloon bags like that? I am very proud to reply no – I made it! ( Or more often “no – the fairies made it for me!!”)


